Tuesday, December 29, 2015

Tips for Liquid Sand Polishes

When liquid sand polishes came out a few years ago and were all the rage I was curious to see what all the hype was about. I heard that they dried fast, lasted longer on the nail, were opaque in one coat, were easy to use and all of polishes were so unique and beautiful. All those things intrigued me. Below are some examples of a few:


I decided to swatch one of the bottles in store to give them a little test (shame on me) and they were so scratchy! When my nail rubbed against my other fingers it totally gave me the willies! It was like someone scratching their fingernail on the chalk board. So, needless to say I didn't purchase one. But they were so pretty! Dang.

Then I had been doing a lot of research on how to cover up the texture of regular glitter on nails because obviously I have issues. Through Young Wild and Polished I discovered this handy little product-
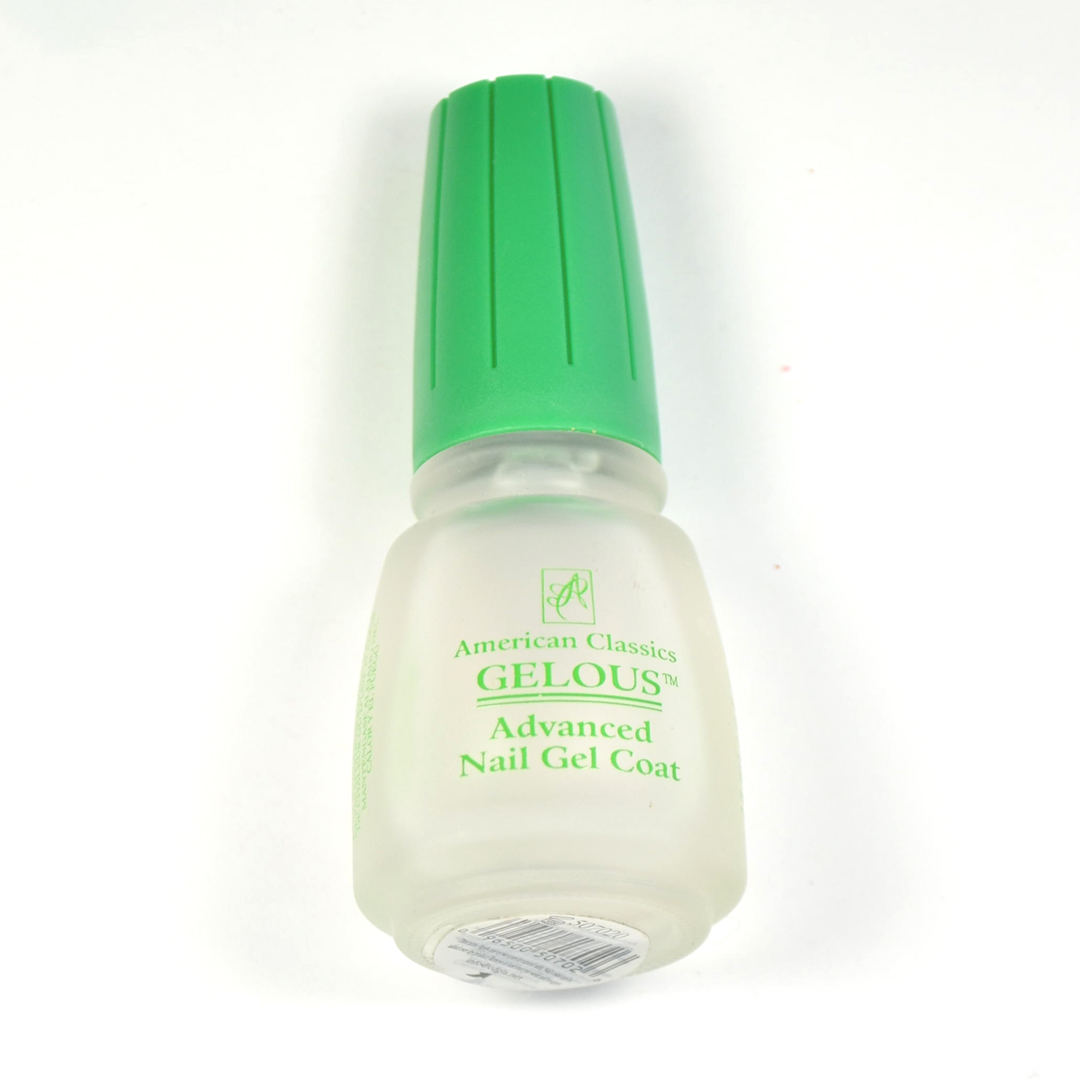
American Classics Gelous! It is just the right rubbery thickness to cover that pesky glitter grit-along with a good top coat. So, I also tried it with my sand polishes (I only have a few), and it works great. It doesn't make it completely smooth, but smooth enough. I also pair it with a good fast drying top coat. I find it works better if you do only one coat of your sand polish that covers all the nail but isn't too thick, then one coat of Gelous and a top coat. Sometimes I will even repeat the Gelous and top coat again. Just know that if you do, it will take longer to dry.

I recently added OPI Ce-less-tial Is More from the Winter 2015 Starlight Collection! It's so beautiful. It's a silver, gold and rose gold polish with iridescent glitter. I knew it would be so perfect for New Years! A glamorous, simple and easy manicure! Or just pair it with your favorite color for a pretty accent nail.


So if you have been wanting to try liquid sand polishes, try it with this and see what you think.  I would still try other products for this purpose so I will keep searching for something even better and let you know when I find it. If you have something that you think works better than this, let me know!

-Go Polished

Monday, December 28, 2015

My #6 Favorite Winter Polish for 2015...

OPI Guys & Galaxies

This deep maroon polish is new from OPI's Winter 2015 Starlight Collection (Star Wars). I love how classic this color is and I feel like it will look good on any skin tone. The formula is a dream, and it was opaque in two smooth coats. I am really happy I picked it up! The swatch below is two coats. 


When I picked Guys and Galaxies up at Ulta last month I thought it would be the same color as Essie's Carry on (which I love), but I was happy to see that G&G is more red toned and Carry On is more dusty and purple toned. Yay! Sleigh Ride for Two is a similar maroon color but has that glittery metallic sheen. So it stands alone in my collection!


I knew I wanted to save G&G for New Years, and I knew I wanted to add some gold glitter to it. So I am elated that New Years is finally here!! Let's party people!! Okay, sorry I got a little carried away, nail polish will do that to me sometimes :). Anyway I love, love, LOVE it! 


So of coarse I made a tutorial for you because I want you to go polished on New Years too!

Here are the products I used (with links)


Click on the link below for the full tutorial with LOTS of important tips for this look!
*If you create this look use #gopolishednails in Instagram so I can see it!


-Go Polished

Thursday, December 24, 2015

My #5 favorite winter polish for 2015...

Zoya Hunter!
Zoya Hunter was part of the Fall 2013 Cashmere collection. It is a slightly dusky, dark forest green. It is a perfect green for the holidays or the fall and winter. The first coat of this polish is a little patchy, but by the second coat it has full coverage. The swatch below is two coats. I love me a good creme green!


This really is the only true forest green polish I have. Here is a comparison to other greens in my collection. Obviously they are not even close to each other, but it gives you a good idea of the color tone when they are photographed next to each other. Looks like I need to pick a few more greens to try since it is my favorite color ;).

I decided to do a gradient with this polish. I think this gradient can be perfect for the holidays if you want something more classic and subtle. At the same time it can be a winter manicure that won't scream "holiday". 


Here are a list of supplies I used to make this gradient design:


I already made a full tutorial for this look with a plum color, so I didn't make another one. I just have the color on the tip and black at the base for this one, and in the other video I have black tips and the color on the base. Does that make any sense? Anyway, just click on the link for the full tutorial!


-Go Polished


Sunday, December 20, 2015

Red Sweater Nails

Red Sweater Nails


I tried these What's Up Nail sweater stickers for the first time today. 


I discovered as I began to use them that they are definitely made for people with longer fingernails. I definitely couldn't fit the whole design on my nail, I could barely just fit the snowflake and one detailed line :/. So, that was kind of disappointing. I wish they made them smaller. Although, at the same time, it was pretty tricky getting all the stickers out of the stencil, so I am not sure they could even make them any smaller. Bummer. So, I decided to make one of the detail lines a french tip and I think it was a good decision because I think it turned out very pretty! So despite me being disappointed at first I was pretty pleased with the result. What do you guys think?!

I also love the red, white and gold combo. I need to  make a quick shout out for OPI Red! It's just gorgeous! I hadn't pulled it out for a long time until this week. It's such a nice juicy red!! It's a staple for any nail polish lover for sure.

Here is a list of products I used to get this design:


Click on the link below for the full length tutorial! You can go polished too, give it a try!
*If you recreate this look use #gopolishednails in Instagram so I can see your design.


-Go Polished


Saturday, December 19, 2015

Black and Gold Fishnet

Black and Gold Fishnet Nail Design


Black and gold are so classic and together they are perfect for the holidays! This nail design is appropriate for Christmas or New Years, especially with that added sparkle. My tutorial makes it simple for you to create this design. If you don't have the striping tape, you can use a brush and paint on the gold lines yourself. :) 

Here are the products I used to create this design:


Click on the link below for the full length tutorial! You can go polished too!
*If you recreate this design use #gopolishednails so I can see your nails!


-Go Polished


Friday, December 18, 2015

Candy Cane French Tip

Candy Cane French Tip


Of coarse I had to do something inspired by candy canes for Christmas. I love this candy cane french tip manicure. Pretty and simple and doesn't take much time! Lots of important tips in my full tutorial so be sure and watch it. :)

Here are the supplies I used to create this look:


Click on the link below for the full length tutorial! Give this manicure a try! You can go polished too!
*If you recreate this design use #gopolihednails in Instagram so I can see your nails!


-Go Polished


Thursday, December 17, 2015

Shatterd Glass Christmas Tree

Shattered Glass Christmas Tree


Since shattered glass nails are the new trend, I wanted to incorporate it into a christmas nail design and decided to go for a Christmas tree. I think it turned out pretty simple and classic. I couldn't find any iridescent green cellophane, so I decided to use some tinsel I had on hand at home. It appears to look 3D even though it's not, which I think is pretty cool! If I did it again I think I would have done a gold star because the silver didn't show up as much as I would like it to.

Here are the supplies (with links) I used:

Green Tinsel


Click on the link below for the full length tutorial on my YouTube Channel. Don't forget to subscribe!
*If you recreate this design use #gopolishednails in Instagram so I can see it!


-Go Polished