Thursday, October 29, 2015

Skeleton and Crossbones Manicure

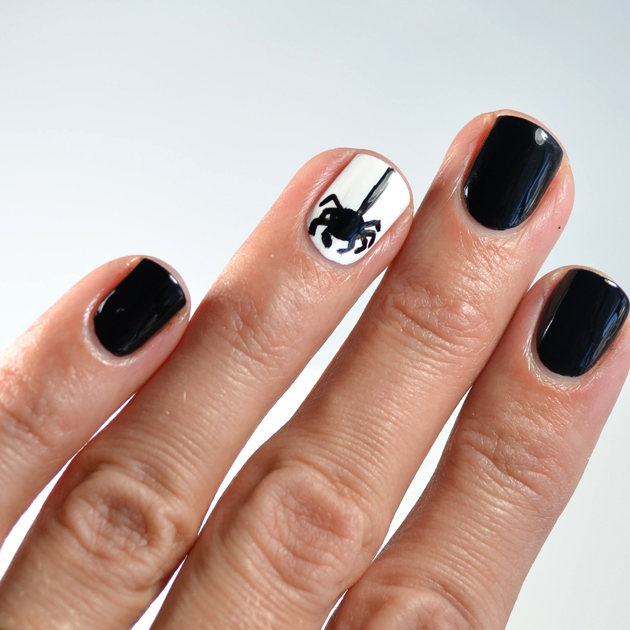
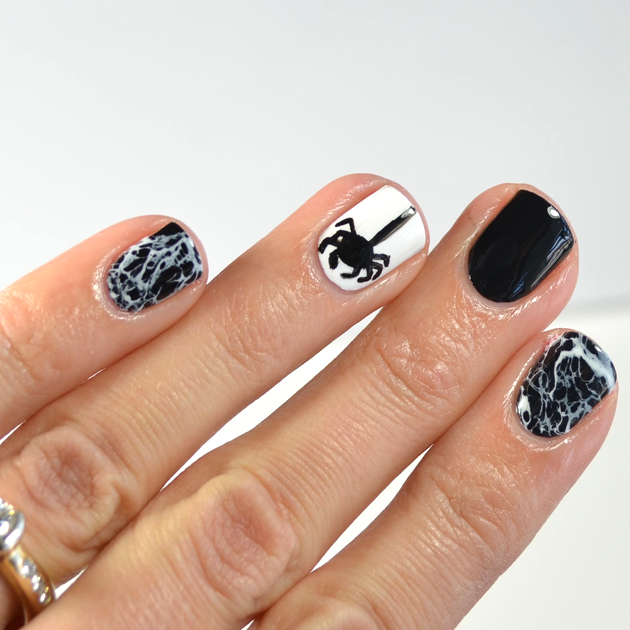
Skeleton and Crossbones Nail Design


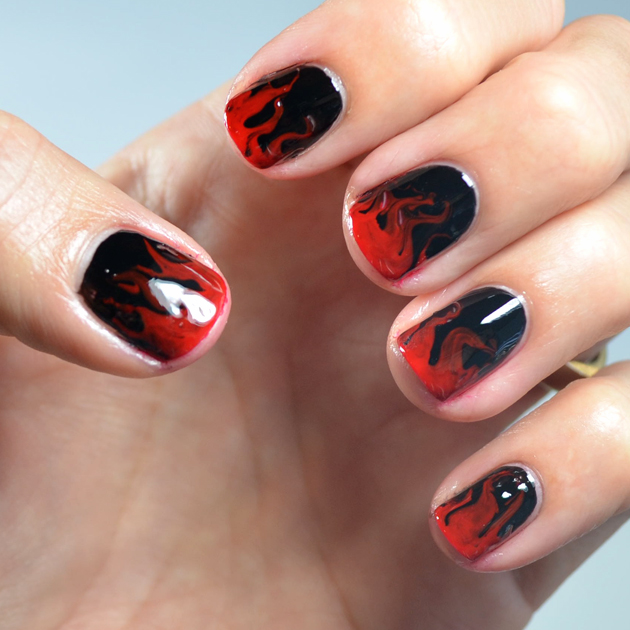
My last nail design for Halloween 2015! This is the manicure I will wear on Halloween Day. I love any black and white design because it can make anything look classic! Even a creepy skeleton and crossbones:). Right?!

Here are the supplies you will need (with links to each product I used):


Base Coat - OPI Nail Envy
Black polish- OPI Black Onyx
White polish -OPI Alpine Snow
Top Coat -HK Girl Fast Dry Top Coat
Nail striping tape -What's Up Nails vinyl regular straight tape
Detail brush -What's Up Nails #2
Pure Acetone
Clean-up brush -Sonia Kashuk no 105


-Click the link below for an easy to follow tutorial!!


*If you recreate my design please use #gopolishednails in Instagram so I can see your designs!


-Go Polished


Tuesday, October 27, 2015

Monster Mash Manicure Tutorial

Monster Mash Manicure


I really love the way this Monster Manicure turned out! And, it was so fun to do! I looked at several clip art monsters online for inspiration and drew out all the monsters so I would have a guide.  I also decided on the color for each monster and what monster I wanted on each nail.

Below are close-ups of each monster, and I couldn't help it, I had to name them and give them some personality! :)

A close up of Bob: a frightening spider monster who loves spending time searching the web.


A close-up of Blobby: a sweet spirited monster who is happiest when he's eating his ghoul scout cookies.


A close-up of Frank: You are right to be afraid of Frank. Frank's favorite foods are beans-human beans!


A close-up of Cyclo: an easy to talk to monster, although he might leave you feeling perplexed after your conversation. Was he winking at you or just blinking?...


A close-up of this green monster. You might be afraid of getting eaten by him, but believe me, he is more afraid of being eaten by YOU. His name is Boogie.


You can do a manicure with all the monsters together (like I did above), or you can choose your favorite accent monster and a coordinating color for your remaining nails. Like this...


Here are the supplies you will need for this design, with links to each one:


Base Coat-ORLY Bonder
White polish-OPI Alpine Snow
Black polish -OPI Black Onyx
Orange polish-OPI Where Did Suzi's Man-go?
Purple polish-OPI Do You Have This Color in Stockholm?
Red polish-OPI Big Apple Red
Green polish-OPI You Are So Outta Lime
Gray polish-China Glaze Intelligence, Integrity and Courage
Brushes-What's Up Nails Detail brushes #1 and #2
Dotting Tools
Pure Acetone
Clean-up brush-Sonia Kashuk no 105 smudge brush
Top coat-HK Girl Fast Dry Top Coat

Give these monsters a try! If you recreate this design please use #gopolishednails in Instagram so I can see your manicures! 

Here is the link to the tutorial:


-Go Polished


Monday, October 26, 2015

Dry Marble Flame Nail Design

I love this Flaming nail design for Halloween!


I ended up really loving the colors I chose for this manicure, Essie Licorice and OPI Big Apple Red, mostly because in bright light the flames really stand out but, in low light the flames are more subtle and the manicure almost looks more like a gradient. Personally I love that! You can definitely use a brighter color though. Do whatever makes you the happy! :)


Here is what you will need to do this simple Dry Marble Technique.


Base Coat: ORLY Bonder
Black Polish: Essie Licorice
Red Polish: OPI Big Apple Red
A round toothpick
Clean-up Brush: Sonia Kashuk no. 105


Click on the link below for an easy to follow full length Tutorial!


-Go Polished


Friday, October 23, 2015

Spider and Web Nail Tutorial

I saw spider nail designs by @kt_tk1 and @lacqaholic on Instagram and decided to combine the two ideas for this next Halloween nail design. You have two options with this design. You can have one spider accent nail with black on the remaining fingers for a more classic look like this one, or...


 ...you can make it a little more spooky by adding these awesome spider webs! So cool, right?!


Supplies you will need: A base coat (ORLY Bonder), a black (Essie Licorice) and white (OPI Alpine Snow) polish, distilled water, a small plastic cup, spritz hairspray, a fine detail paint brush (What's Up Nails detail brush #1), pure acetone, and a clean-up brush (Sonia Kashuk no. 105 smudge brush from Target). Liquid latex is optional, but it cuts down on the mess and makes for easy clean-up. (I just put mine in an empty nail polish bottle for easy application.)


Click on the link below for the tutorial!


-Go Polished


Wednesday, October 21, 2015

Fall Pumpkin Nail Tutorial

My 6 year old daughter came to me the other day with a green polish, a blue polish and an orange polish. She knew exactly what she wanted. She wanted grass, sky and pumpkins on her nails. I love that she thinks about these things :). So we sat down and came up with this-


She also said she wanted me to be a twinner with her. Is that even a word? Anyway, I came up with the manicure below. I love being twins with my daughter at times-even if it means I have to wear pumpkins on my nails. Not usually my thing being that I am, ahem, a little bit older ;), but I really like this design for you younger folks. :)


Here are the supplies you will need for this nail design. Base Coat (not pictured), cream, brown, orange, blue, green and red polishes. Acetone, a dotting tool and a small craft brush, and a fast dry top coat.

You can use any polish brand you would like but, I have to say there is something about these OPI colors! The formula on these allow them blend together seamlessly, and they have such a nice glow from within. Can't quite explain it, but they just work!


The specific supply list (with links for each product) is listed in the description bar of my tutorial. You can find the full tutorial below.


-Go Polished


Monday, October 19, 2015

Googly Eye Halloween Nail Tutorial

My most favorite Halloween nail design ever- GOOGLY EYEBALLS!!


So simple. So fun. So adorable. So classy. And, most importantly SO easy!

All you need is a good base coat, a black and white polish and a dotting tool (or a toothpick from home). You will also need some pure acetone (any brand will do) and a clean up brush to make it look nice and neat!

(The specific products I used as well as a link to each are listed in the description bar on my YouTube tutorial. Just click on the tutorial link below.)


Below is link to the full tutorial so you can GO POLISHED too!! Let me know how it works out for you! Ha! That rhymed :) I always feel like somebody's watching me...who's playing tricks on me. Sorry couldn't help myself!


-Go Polished


Friday, October 16, 2015

Candy Corn Nail Design

Since Halloween is approaching I wanted to do a few Halloween inspired nail designs. I am starting out with this candy corn design. I wanted it to be a little different than your standard candy corn manicure, and I have been loving negative space lately, so I decided to put them together. I also wanted to keep it pretty simple so it would be a design that I might actually wear and not feel like a 5 year old :). So, I decided on only a few candy corns with a classy white polish for the remaining nails. I tend to be pretty conservative when it comes to polish, although I am starting to branch out a little. :)


Here are the materials you will need for this design:

A good base coat, a yellow, orange and white polish, a fast drying top coat, nail stickers, acetone and good clean-up brush.


Here are the specific products I used with links :)-

The base coat I am loving right now is ORLY Bonder.
Straight Skinny Tape is from What's Up Nails. There are many different places you can get nail stickers, you don't have to specifically use What's Up Nails (although they are fantastic). You can find stripping stickers at Sally's, Walmart and sometimes Target. If they are thicker than I want I usually just cut them to the size I like. You could even cut and use strips of tape from home. Just always make sure your polish is completely dry.
Pure Acetone for Clean-up: Any brand
Smudge brush for Clean-up: Sonia Kashuk No. 105 smudge brush
Top Coat: imn Out The Door fast dry top coat.

Here is the tutorial!! Check it out!


Over the next few weeks leading up to Halloween, I will be sharing more Halloween inspired nail designs! So, stay tuned!


-Go Polished


Thursday, October 15, 2015

My #8 Favorite Fall Polish for 2015...

ZOYA Yuna!


If you haven't tried any Zoya nail polishes, you should! Each one I have tried I have loved. Their formula seems to be so consistent and they have such a wide variety of colors and finishes. Yuna is no exception! It was released as part of their fall Ignite collection in 2014. Yuna is a graphite gray polish with glittery copper and gold flecks (which can shift green in some lights). The formula is great-just like any other Zoya nail polishes I have tried. You can find select Zoya polishes at Ulta. Amazon carries some of their colors. Zoya also offers great deals and discounts every few months online, so keep your eyes out for those sales.


It takes 2 generous coats for this polish to be opaque. This swatch is 2 coats. Yuna is like Fall in a bottle! I fell in love with it last fall, and I was definitely anxious to break it out again this fall.

As far as comparisons go, nothing really compares to this polish. It's just in a league of it's own! I can find a few with that same smoky gray color, but they lack the gorgeous glittery sheen. I never would have thought I would wear a glittery polish (I am more of a cream girl), but Zoya's glitter polishes are different. Just enough sparkle, but nothing too obnoxious or cheesy. If you know what I mean :). If you haven't tried one, what are you waiting for?!

I chose to do a gold flower design with Yuna. It's a stunner for sure! I love the way it looked with just part of the flower on each nail instead of a whole flower. LOVE!


Here is a tutorial if you want to try this out for yourself!


-Go Polished

Sunday, October 11, 2015

My #7 Favorite Fall Polish for 2015...


Bahama Mama has been a favorite of mine for a LONG time! It has been a favorite for many people for a long time. It was released in a collection in 2007 and is now part of Essie's permanent line. Yay! Essie describes Bahama Mama as a warm, rich, creamy deep purple. The formula of this polish is my favorite nail polish formula- crelly (the perfect mix of cream and jelly). 


Crelly formulas apply SO smoothly and leave the greatest shine! See that shine?! Wow! This swatch is two generous coats. LOVE!


I put Essie Raspberry in there to show you how much more pink and bright it is compared to Bahama Mama. Purr-fect Plum has a more creamy  formula and opaque but,  I have to admit even though you have to do two to three coats with Bahama Mama, I like the crelly formula better. Just a preference of mine. Essie Carry on and We'll Always Have Paris are deeper plum polishes. Here is a close up of these polishes :).


I knew a gradient nail design using Bahama Mama and Licorice (black) would be perfect for fall! I love how rich and vampy it turned out! It's been warm here the last few weeks and this mani had me craving that true fall weather!


Here's the link to my YouTube channel for the full tutorial. Give it a try, it's really pretty simple-you can go polished too! :)


-Go Polished


Thursday, October 8, 2015

My #6 Favorite Fall Polish for 2015...

Butter London Lady Muck!


My favorite dusty blue shade for fall! I love this SO much because it is so unique. It is the perfect balance of gray and blue. The formula is a little sheer, but it builds up well with 3 coats. I applied 3 coats for the swatch below.


Lady Muck does have a slight silver shimmer to it, which is part of what makes it so unique. Sometimes when you have a polish with shimmer it doesn't translate to the nail, but the shimmer in Lady Muck does. And, it's just the right amount, it's not obnoxious at all. It's just SO fabulous for fall. I always wear brown when I wear it because they just make the perfect pair. :)

I couldn't find anything that came close to this color in all my searching. So I photographed it with these just to show you the color difference.


As you can see, compared to Essie Pedal Pusher, Pedal Pusher is much more blue and yellow. It also shows how mirky Lady Muck is compared to Essie Bikini So Teeny. Nothing quite like it! So, even though Butter London polishes are a little pricey, this one is definitely worth the money (in my opinion)!! You won't be disappointed if you get it. I promise! I really feel like it's a shade that would look good with any skin tone.

I decided to use my What's Up Nail stencils again for this look. This time the Moroccan stencil. I think it turned out so pretty!


Here is a short tutorial for this look. I didn't feel the need to make a full length tutorial because it was so similar to my Fall Leaves stencil tutorial-which you can find Here. You will see, the only difference is that I painted the top color on because it didn't sponge on very well.


So, what do you think about this color? Do you love it too?


-Go Polished  


Monday, October 5, 2015

My #5 Favorite Fall Polish for 2015...

OPI How Great Is Your Dane?!


This rich chocolate brown polish is from the OPI Nordic Collection from fall 2014. It's formula is perfection. In fact all the polishes I have tried from this collection have fantastic formula.


It is rich, but is also slightly greyed out. So, so beautiful! Dark brown polish is perfect for this time of year!

Comparisons: As you can see You Don't Know Jacques (a cult favorite) has just about the same color tone (with maybe a touch of purple) as How Great is Your Dane but, HGIYD is darker. Both are awesome:)! Essie Mochacino is more of a gray brown and Zoya Chanelle is more of a yellow brown.


I ordered some stencils from What's Up Nails that I was dying to try out. I went with the leaves stencil for this manicure design using How Great Is Your Dane. Love the gold with the brown! What do you think?!


Click on the link for the turtorial :)...


Do you think you might give this a try?


-Go Polished


Thursday, October 1, 2015

My #4 Fall Favorite Polish for 2015...

Essie Vested Interest!


My most favorite out of all my fall picks. I always love a good green polish though. Ha! This polish is from the Essie 2013 Fall Collection. It is a very greyed out green with a little splash of blue. The creamy formula is very easy to work with and it has the perfect thickness. LOVE!


This swatch is two thick coats. So beautiful and perfect for fall, ya'll!


As you can see in this photo, it does really have a bit of blue in it, especially compared to Sew Psyched, which is more of an army green. And, it is much darker than Maximillian Strasse-her. (Just so you know I could have put all these greens in my favorites :), but I had to limit myself to one green.)

If you picked up Essie Fall In Line from Essie's 2014 Fall Collection, then you definitely don't need Essie VI because they are pretty much dupes. I don't own that polish-for obvious reasons so I couldn't picture it here. VI is such a unique color, in my researching I found only one easy to find polish that comes pretty close to VI, and that is China Glaze Take a Hike from their 2015 Fall Collection.

I decided to go with a Fall Flower nail design with negative space. I love the way it turned out!


If you would like to see the tutorial, head on over to my YouTube channel by clicking on the link below...


Do you love this color as much as I do?!

-Go Polished